Here's some more student art that I am very impressed with.
Claire
Gavin
Jacqui
Orazio
Steph
Not fantasy art related but I thought Steph had done a storming job on these portraits. Nice work Steph!

I am a professional illustrator, providing illustration for books, magazines, posters and (rock band) merchandize . I also storyboard for film, tv, video games and tv ads. Teaching is just something I enjoy doing. Just an attemp to give something back. Not everything I post here will necessarily work for everyone.
Wednesday, 23 March 2011
Wednesday, 16 March 2011
Pocket Sized Kurt Cobain
Following in the current trend of Pocket sized Marvel reprints of silver age comics, we now have pocket sized Kurt Cobain!
http://www.independent.co.uk/a
Not relevant to the class but it qualifies for a post as it is a kind of fantasy art as it uses a lot of artistic license.
And also if it sells well, I'll get some royalties, so go buy it NOW!
http://www.independent.co.uk/a
Not relevant to the class but it qualifies for a post as it is a kind of fantasy art as it uses a lot of artistic license.
And also if it sells well, I'll get some royalties, so go buy it NOW!
Wednesday, 9 March 2011
Fantasy Art Class Week 7 8th March
Good work to everyone who turned up to class this week. Here's a recap of this weeks class.
Before commencing on the final piece, I produced a few thumbnail layouts and colour schemes to help me decide on the chance of colour and layout.
Start by dividing the page with a vertical centre line. The rectangular shape is where the figure will sit.
This drawing is really simple, no dramatic action, so all the attitude will be in the pose. Take care to get the angle of the hips and shoulders right.
When drawing the face, keep it simple. Take a close look at the eyes, nose and mouth, notice it is accomplished using a minimum of line work.
Here, the hair, clothing and cape has been added. Keep the hair simple and the shape of the cape uncomplicated.
Here, the detail for the gauntlet has been added. Feel free to create your own design.
Once you have finished the pencil layout you can ink over the drawing. This image was inked using a fabre castell brush pen
Now add the colour of your choice to the character. Shading can be added using a grey marker, if you are using inks or gouache.
Finish off by applying highlights to give that extra lift to your drawing.
Here is some excellent work from last weeks exercise.
Claire
Jacqui
Mohamed
Wednesday, 2 March 2011
Fantasy Art Class Week 6 1st March
Very impressed with everyone's work this week.
This exercise seemed to coax the best out of you. For those of you who missed it and for those of you who want to have another crack at it here is a breakdown of the exercise from pencil to ink to highlights. The purpose of this exercise is to produce a finished piece relatively quickly using just spot colour on coloured paper. You will need black and blue markers and a pentel highlighter/correction pen.
These pencil stages are shown on white so that the tutorial is easy to follow.
Loosely plot the layout, notice the way the body of the faun works with the curve and flow of the tree.
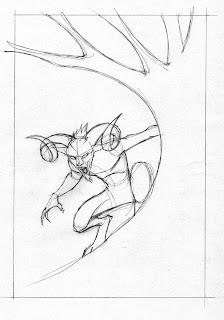
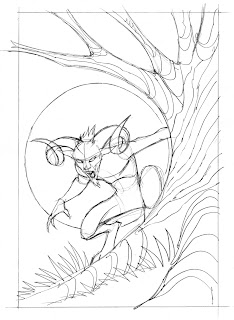
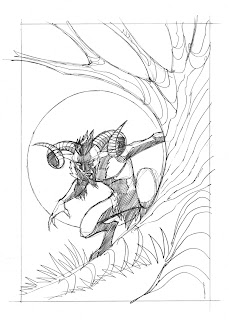
When the pencil work is done and you are happy with the layout, finish off the drawing with a marker or ink pen. I used a fabre castell brush nib ink pen. I used a tria reflex blue marker and a pentel correction pen for the highlights. Here is another version on different coloured paper, using a black marker, an old pantone marker 032 (now discontinued) but a copic basic red marker will do fine, a neutral grey copic marker and a pentel correction pen.
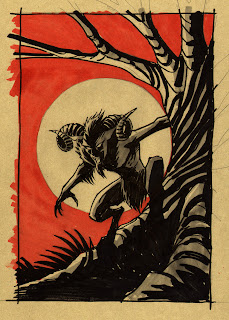
Here I have used a grey marker to make a softer blend between solid black and lighter tones.
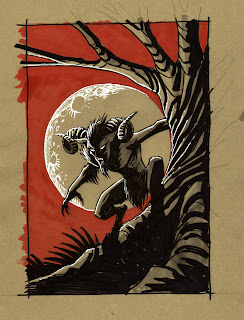
Finally add highlights using a correction pen or gouache or whatever.
Subscribe to:
Comments (Atom)


